
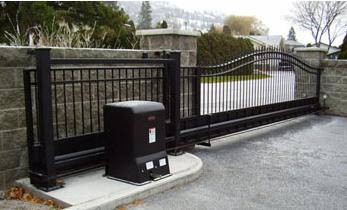
Why does my slide gate opener move a few inches and then stop or reverse?
When a slide gate moves only a few inches and then stops or reverses, the operator is usually detecting an active safety input, unexpected resistance, incorrect limit or position feedback, or a motor-drive fault. Start with the control-board diagnostics and note exactly where the gate stops. The failure pattern often identifies whether the problem is electrical, mechanical, or control-related.
Read the Diagnostic LEDs or Fault Display First
Do not start by changing force settings or replacing the control board. Watch the input LEDs, display, or stored fault history during the failed cycle. The controller may be reporting a monitored photo eye, sensing edge, STOP circuit, obstruction event, overload, limit problem, or motor feedback fault.
Technical Field Note: Diagnose the first fault, not the final stop
A gate may move several inches, encounter resistance, reverse, and then display a shutdown or secondary alert. The first input or fault that changed during movement is usually more useful than the final condition after the gate has stopped.
Check Photo Eyes, Edges, and Stop Inputs
A monitored entrapment device can interrupt movement when the control board sees an obstruction or loses the expected monitored signal. A misaligned photo eye, damaged sensing edge, weak wireless edge connection, wet connector, or damaged field wire can cause the gate to start and then stop or reverse.
Do not permanently bypass monitored photo eyes or sensing edges. Verify the sensor model, interface, wiring method, and control-board input before replacing parts.
Mark the Exact Place Where the Gate Fails
If the gate stops or reverses at approximately the same physical location every cycle, inspect that part of the travel. A repeatable failure point often indicates mechanical resistance or drive misalignment rather than a random electronic problem.
Check V-track for damage, debris, settlement, or a raised joint. Inspect wheels and bearings for binding. On a cantilever gate, look for roller wear, frame sag, or a change in gate height. Guide rollers that are too tight can create side resistance, especially on a solid privacy gate during wind.
Technical Field Note: The gate can move freely for three feet and still be mechanically bad
Operators react to the worst point in the travel. A bent track section or failing wheel may only load the motor at one location. Testing the gate only near the closed position can miss the resistance that causes the reversal.
Chain and Rack Problems Can Trigger Obstruction Logic
On a chain-driven operator, inspect chain alignment, tension, sprockets, idlers, master links, and gate brackets. A chain that tightens dramatically at one point may indicate changing gate geometry. A chain that walks sideways on a sprocket can add drag before it derails.
On a rack-driven gate, inspect rack height and engagement through the full travel. A loose rack section, gate sag, or changing rack-to-pinion clearance can increase resistance at one position.
Obstruction or Overload Sensing May Be Stopping the Gate
Many slide operators monitor motor load or use inherent obstruction sensing. When the motor encounters more resistance than the controller expects, the operator may stop or reverse.
High resistance can come from a physical obstruction, an overweight gate, wind load, damaged rollers, track problems, or a gate slamming into a stop. On some control platforms, high motor current is reported as an overload condition.
Force, acceleration, and slowdown settings are model-specific. An overload caused by real mechanical resistance should not be treated as a simple force-adjustment problem. Follow the exact manual and retest safety functions after any approved setting change.
Technical Field Note: South Florida wind can expose a marginal gate
A solid steel, wood-covered, or privacy slide gate can develop additional side load when wind pushes it into the guide rollers. A gate that works on a calm day may trigger obstruction logic during strong gusts if the guides, rollers, or frame leave little operating margin.
Check Limits, Encoders, RPM Sensors, and Position Feedback
The controller must know whether the gate is at an open limit, close limit, or moving between positions. Depending on the operator, that information may come from limit switches, magnets, cams, encoders, RPM sensors, or learned travel.
If the position signal is missing or inconsistent, the controller may stop because expected movement does not match the feedback it receives. A board replacement or sensor repair may also require a model-specific relearn procedure.
Compare the limit LEDs or position display with the physical gate. If the board shows an impossible position, both limits active, or no expected movement feedback, follow the sensor, harness, connector, and control input.
What if It Moves Only a Few Inches Immediately After Startup?
A failure almost immediately after the motor command can narrow the search. Listen for motor strain and watch whether the board resets, reports overload, or shows a motor or position fault.
Check battery condition on battery-powered operators and verify supply voltage on AC-fed systems according to the manual. A board with lights does not prove the motor supply remains correct under load.
On some DC systems, a motor no-load or drive fault can cause a short movement attempt followed by a fault. The diagnostic path may include board output, power-switch wiring, and motor checks. Do not apply one manufacturer's voltage test to another operator family.
Compare Open and Close Direction
If the problem occurs only while opening, focus on open-direction safety inputs, open limit or position logic, and resistance during opening. If it occurs only while closing, check close-direction photo eyes, edges, close limits, and closing resistance.
Before You Replace a Part
- Record the exact operator model and control-board revision.
- Read the input LEDs, display, and fault history during the failed cycle.
- Mark the exact gate position where movement stops or reverses.
- Check monitored photo eyes, sensing edges, and stop circuits.
- Inspect track, wheels, cantilever rollers, guides, and gate-frame movement.
- Inspect chain, sprockets, idlers, brackets, or rack engagement.
- Compare limit or position indications with the physical gate position.
- Check for motor strain, overload, board reset, or model-specific motor faults.
- Verify battery or supply voltage for the exact operator architecture.
- Do not increase force or bypass safety inputs to hide the symptom.
Technician's Corner
The fastest diagnostic split is repeatable location versus immediate startup. A gate that stops at the same place every time often has track, wheel, chain, rack, or gate-geometry resistance at that point. A gate that moves only a few inches immediately after every command may have a safety input, overload, motor-feedback, power, or control problem.
Use the operator's diagnostics to prove which system is reacting before selecting a board, motor, sensor, limit assembly, encoder, chain part, or rack component. Similar-looking control boards and sensors may use different monitoring logic, harnesses, firmware, or position feedback.
Related Technical Categories
Slide Gate Openers
Gate Opener Circuit Boards
Gate Opener Replacement Parts
Gate Safety Devices and Photo Eyes
Slide Gate Chains and Drive Hardware
Before selecting replacement hardware, verify the operator model number, part number, voltage, frequency, connector or terminal type, safety-device monitoring method, limit or position system, and operator generation. Confirm the existing sensor, encoder, motor, harness, chain, rack, or control board against the exact parts documentation before replacement.
